| Home | Portfolio | Support | Contact |
|
|
|
|
Outlook Express - ConfigurationNB: ONLY for email accounts provided by WebsiteSprite Hosting |
||
| 1. | From the Outlook Express menu choose Tools .. Accounts. | 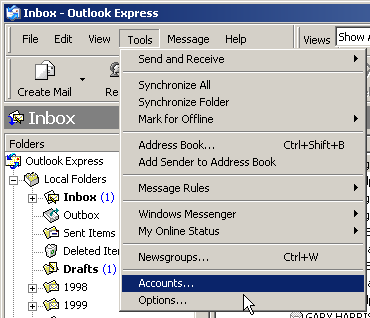 |
| 2. | Click on the Add button on the right and choose Mail. | 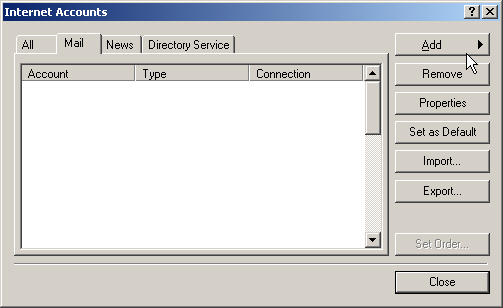 |
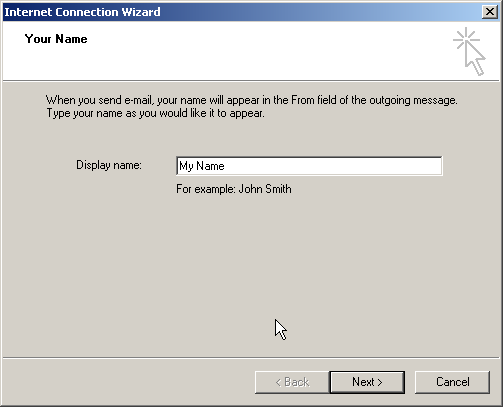
| 3. | Enter
the name you want to appear on your outgoing emails e.g. Fred
Smith or Global Groceries Ltd. Then click Next. |
 |
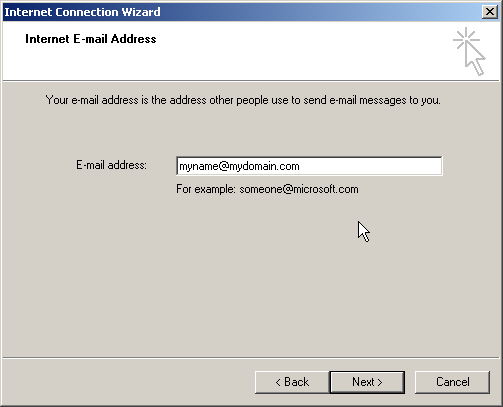
| 4. | Now
enter the email address you wish to appear on your outgoing emails e.g.
fred@mydomain.com or sales@globalgroceries.com.
This is usually the same as the one you receive email on BUT if you have your own domain name which forwards mail to the "real" address use the one for YOUR domain here e.g. me@mydomain.com. Then click Next. |
 |
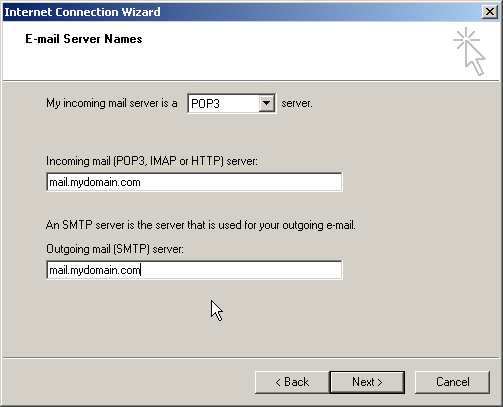
| 5. | Choose
POP3 from the drop-down list. Now enter the name for your incoming mail server e.g. mail.mydomain.com. Now enter the name for your outgoing mail server. This can be the one supplied by your Internet Service Provider (ISP) e.g. smtp.btinternet.com. or you can use the WebsiteSprite SMTP server by entering the same name as the one above for incoming mail e.g. mail.mydomain.com Then click Next. |
 |
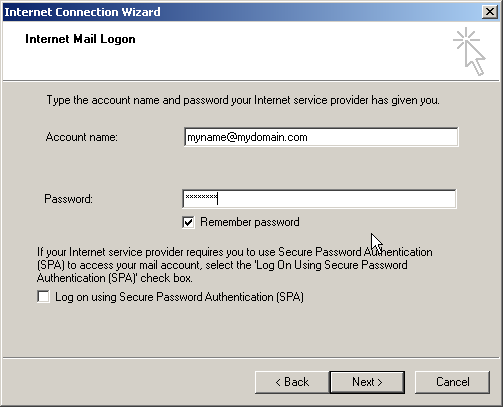
| 6. | Now
enter the account name and password. Be careful to type the FULL
account name exactly as provided e.g. fred@mydomain.com.
Tick the box "Remember password" if you do not want to be prompted to enter your password each time you download mail. Then click Next. |
 |
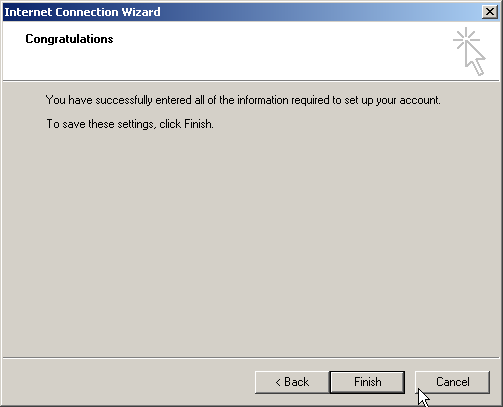
| 7. | The
basic setup is now complete. Click Finish. |
 |
|
Additional setup |
||
| 8. | Highlight (click) the account you just added and click Properties (or just double-click the account). | 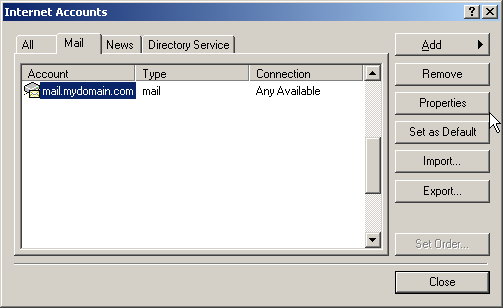 |
|
If you wish to use your own Internet Service Providers (ISP) outgoing (SMTP) mail server please continue with Step 9. OR If you wish to use your WebsiteSprites outgoing (SMTP) mail server please continue with Step 12. |
||
|
ISP outgoing mail (SMTP) setup |
||
| 9. | Click the Servers tab. In the section labelled Outgoing Mail Server, you may need to tick the "My server requires authentication" box. Your ISP will tell you if you need to do this. | 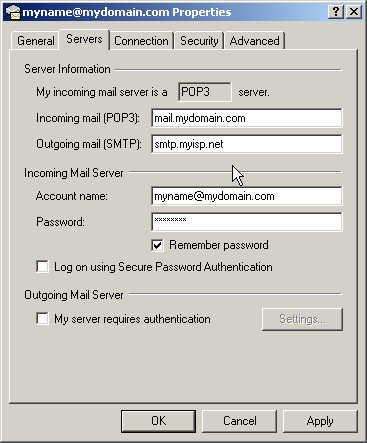 |
| 10. | If YES tick the "My server requires authentication" box. | 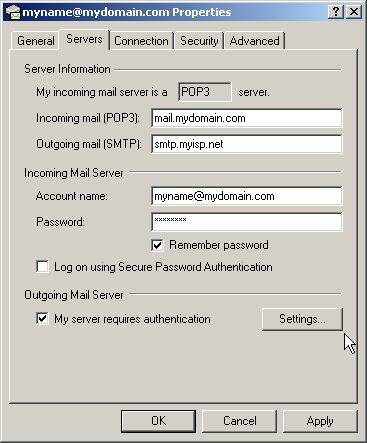 |
| 11. | Then click Settings, select "Log on using" and enter the usename and password your ISP gave you here. | 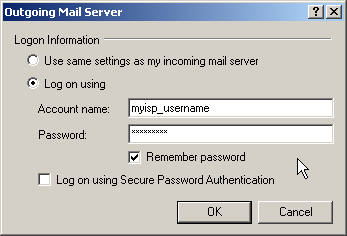 |
|
WebsiteSprite outgoing mail (SMTP) setup |
||
| 12. | Click the Servers tab. In the section labelled Outgoing Mail Server, tick the "My server requires authentication" box. |  |
| 13. | Then click Settings, select "Use same settings as my incoming mail server". | 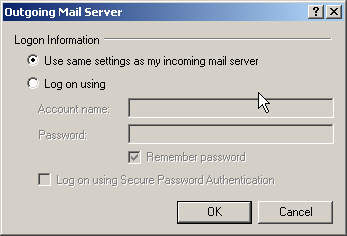 |
|
The following section is optional BUT recommended. |
||
| 14. | Change the account name to something more meaningful e.g. the email address of the account fred@mydomain.com. |  |
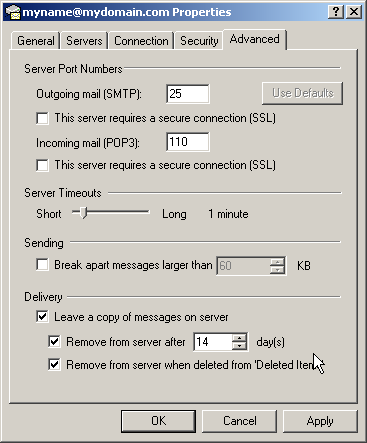
| 15. | Finally
we recommend that you tick the following boxes on the "Advanced" tab: 1) "Leave a copy of messages on server" 2) "Remove from server after 14 days" 3) "Remove from server when deleted from 'Deleted Items'" |
 |
| © WebsiteSprite.com | ||